A Novice Hiker on Kilimanjaro – Machame Route
A Novice Hiker on Kilimanjaro
Kilimanjaro Climb Report: Machame Route
From not even a dream to signing up
Some 30,000 people climb Mt. Kilimanjaro every year. People of all ages, widely different physical make-up and degree of fitness. Which is comforting to know in the pre-climb decision-making phase. When you’re asking yourself if you too, can do it. If you too, have what it takes to join the small crowd of people who reach the roof of Africa every year, raising both hands in triumph in front of the iconic wooden Uhuru Peak sign and looking down upon the clouds, from 19,300 feet. It is good to know that kids as young as 7 (legal age is 10), and more seasoned climbers in their mid 80’s – as well as hundreds of physically challenged individuals – make it all the way to the top, all the time. It can get a little daunting too such as when a well-meaning individual sent me a link to a video about a successful Kili summit attempt by a person who had neither feet nor hands. The implication being that it should be a cinch for an able-bodied individual like me. Thanks pal.
Looking back, my Kilimanjaro climb ambitions were hardly ever in the ‘burning desire’ category. To be sure, I had seen the mountain several times over the last 15 years or so, mostly partially shrouded in clouds. A few times flying over it en route from Johannesburg or Zanzibar to Nairobi and then again from both the Tanzania and Kenya sides, on photographic safaris. Kilimanjaro was something I wanted to get in a photograph with some elephants or giraffes between me and it. Not something I had any desire to tackle with boots and poles.
This all changed when my friend Clemson Smith-Muniz first brought up the topic a few years ago. I was somewhat intrigued, but not having done any climbing or even serious hiking, at that stage, I thought about it for a day or so and then moved on to something else. The seed was planted though. When Clemson brought it up again a couple of years later, looking for assistance to put the trip together, I thought why not and pretty much invited myself along. It was a spur of the moment decision, the kind of thing you wake up to a few days later shaking your head. You’re a runner, not a mountain climber or even a hiker. You don’t even own walking sticks or ‘serious’ boots. Kilimanjaro? Really?
Having made a rash decision to get on board, I did follow it up with a sensible move which was to get in touch with Steve Turner and his team at Origins Safaris, for advice on the best route, time of year, planning, equipment, training and selecting a competent local outfitter, who’d be responsible for our well-being and safety, and would hopefully get us to the top.
Having worked with Origins for many years, I was not surprised when I received impeccable advice and answers to all my questions as to where, how, when and with whom. We settled on the Machame Route (with an extra day to acclimate), in the month of February (least wet) and with Summits as our local operator.
TRAINING AND PREPARATION
In retrospect, the most important thing I got right in the lead-up to climbing Kilimanjaro, was to work with our Kenya destination management company, Origins Safaris. Their training and preparation hints and guidelines, their detailed equipment list and medical preparation hints and cautionary advice, were invaluable. My personal list of things to do to give yourself the best possible chance for summiting Kili has seven items:

Select a longer route or add a day
Over the years it has become clear that the success rate for a Kilimanjaro ascent is significantly higher on the longer routes like Lemosho (eight days) and either Machame or Rongai with one additional night added for acclimating, making them seven days each. Working with a good operator and with some solid preparation the success rate for these treks is high with most climbers making the summit or at least Stella Point. By contrast a much smaller percentage of the climbers on the Marangu route (5 days) reach Uhuru peak. A five-day climb is not long enough for proper altitude acclimatization, with the result that many climbers are affected by altitude sickness or simply turn around because of exhaustion.
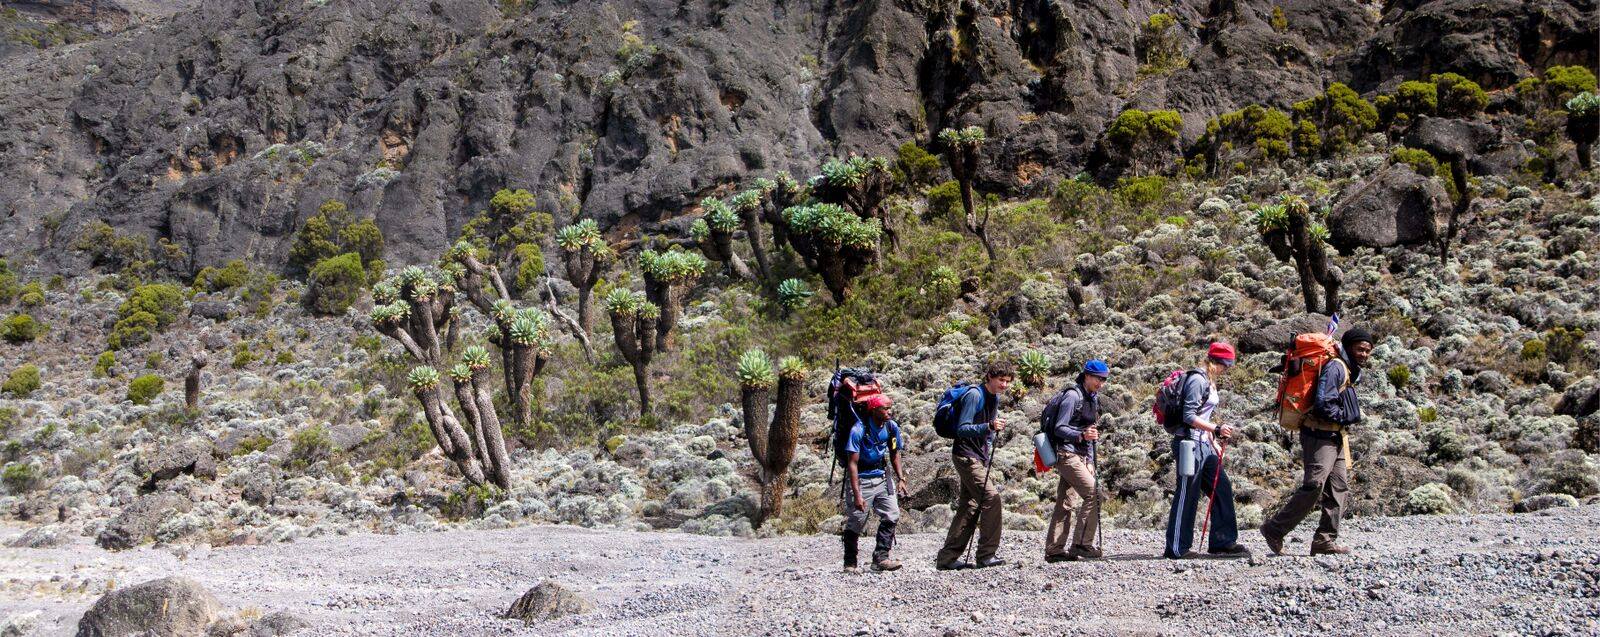
Do some hiking or climbing before you go
This may seem self-evident but climbing Kilimanjaro is physically and mentally challenging. While technical mountaineering skills and equipment are not required for the ‘regular’ routes, the sheer duration of the climb, the near daily increase in altitude and the many hours of hiking day after day will take their toll on the unprepared or poorly prepared climber. Depending on the route, you may even walk steeply down into and up out of glacial valleys. My advice is to find some hills or slopes, strap on a weighted backpack (don’t make it too heavy at first), grab your walking sticks and start hiking an hour or so, perhaps four times a week. Make it longer on weekends, and gradually increase the duration and weight. Carry at least two containers of water and stay hydrated; if you are going to use a bladder system, start using it now.
In addition, plan on doing at least one medium-high climb, such as a 14,000’ peak in Colorado or elsewhere. It’s great preparation and should give you a fair indication of your state of readiness. In my own case I really struggled on the last few hours of a Wheeler Peak ascent (13,167 feet) in New Mexico, about 5 months before my planned Kili climb. Without the help of Clemson – who helped me with my heavier pack – I likely would not have made it. In the end the Wheeler Peak experience was a major wake-up call. I immediately sketched out a training program and started hiking up and down the Buffalo Bayou levee walls with a heavy pack the very next week. It worked.
Select and take the right gear
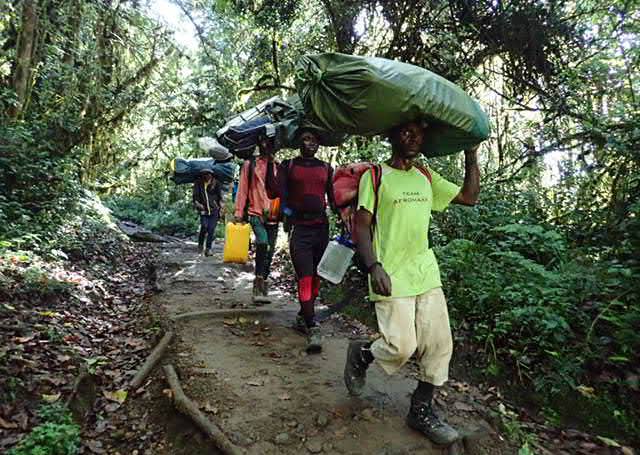
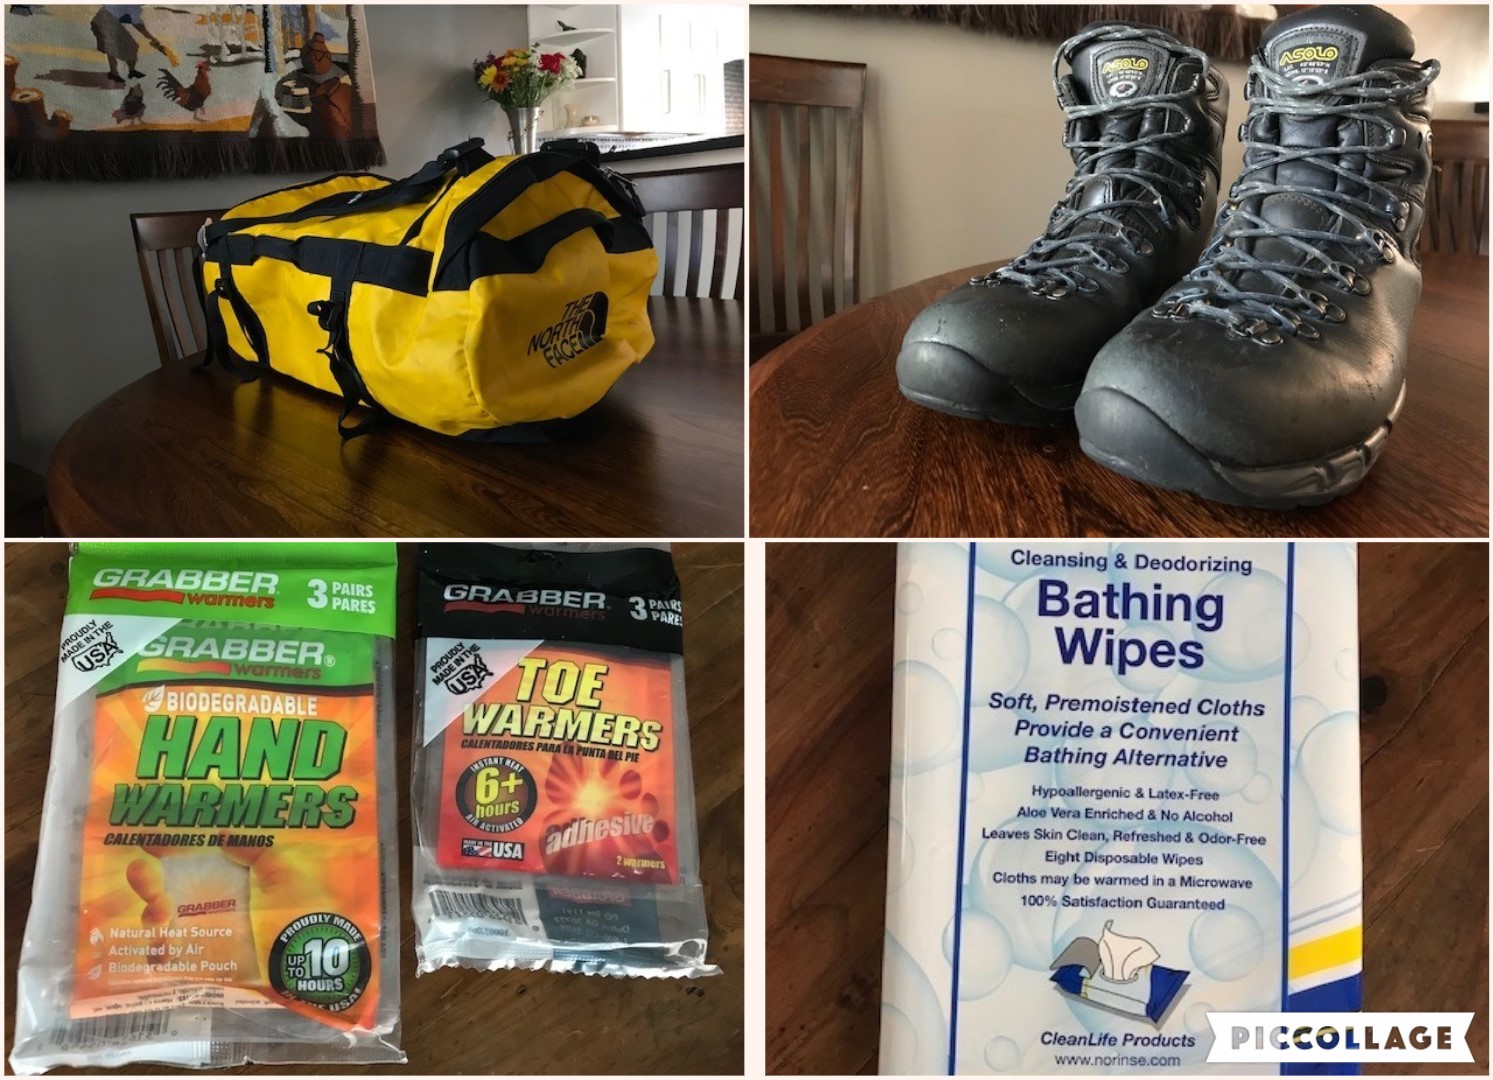
A Kilimanjaro ascent is challenging enough not to have inferior equipment or the lack of an essential piece of gear complicate things. A good operator will supply you with a detailed list – be sure to read it well before the trip starts. A proper Kilimanjaro kit can’t be thrown together the day before! It starts with the right kit bag (waterproof), a light day pack, layered clothing, a quality water-proof jacket and pants and most importantly – a good pair of water-proof boots. Our group found out the hard way – having to endure a tropical downpour of epic proportions on the first day – just how important a good pair of boots is. Two climbers in our group got their boots wet and that creates a potentially serious issue for the entire rest of the trek, with heat and sunshine (to dry the boots out) being scarce commodities.
Among the items not generally mentioned in packing lists but which I personally found most useful, are a cheap plastic poncho (it will keep you dry in even the worst tropical downpour) and a rechargeable Luci Light, to provide some light inside your tent. At higher altitudes you’ll be spending many hours inside a small dark tent and having some light helps to dispel the gloom and makes it a little bit more livable. Also having light (other than a headlamp) is useful to read by or to find things and to get dressed in the mornings. I found that the Luci Light received a sufficient charge to keep it going for the duration of the trip, despite the general lack of sunshine.
Stay hydrated and properly fed
Hiking for 4 hours plus pretty much every day, and as many as 16 hours on summit day makes heavy demands on one’s body. To keep your strength up you absolutely have to stay properly hydrated and well fed by drinking liquids (mostly water) throughout the day and consuming nourishing food regularly. A good quality operator like we had will serve you some nice, palatable foods at breakfast, lunch & dinner. They will also provide a steady supply of purified water – and snacks like candy bars and nuts to consume along the way. Even so it is a good idea to bring a few of your own favorite snack bars along to keep in your day-pack. I personally did not eat as many as I thought I would, but people’s mileage varies. As for hydration, a bladder system usually works well except that the tube is subject to freezing up in really cold weather. So be sure to have it well insulated or take some water in a couple of Nalgene bottles as well.
Maintain a positive attitude
Staying positive when fatigue sets in – as it inevitably will – is crucial on Kilimanjaro. When the conditions turn sour, or you’re suffering from blisters, a lack of sleep, diarrhea or nausea, feeling down and starting to doubt your own ability is understandable and even predictable. This is where perseverance plays a key role. It is easier said than done but simply putting one foot in front of the other and not dwelling on how many more hours you have left on the day, is the best strategy. It is all about dealing with the next 20 meters and not worrying about what tomorrow will bring. Your guides and porters as well as your fellow climbers will help to cheer you up and having them around to talk about what to wear the next day, seeking advice for issues you may be experiencing and to share a few stories and jokes, is invaluable.
Take your time
On Kilimanjaro – as in any high altitude environment – taking it slowly and literally step by step is definitely the way to go. It is one of the first things your guide will talk about – ‘pole pole’ or ‘slowly slowly’ in Swahili – and you will hear the phrase repeated constantly. There is no shame in falling behind a bit on a day on which you may just not be able to keep up. Better to take your time on the way up rather than burning an excess of energy and running out of steam a day too soon. You may be surprised about how slow the initial walking is; even along flat terrain and on slopes where you’d ordinarily speed things up quite a bit. Not on Kili: every ounce of energy is going to be called on when summit day comes around, so save it for then.
Have a game plan for Summit Day
Summit Day is when you’ll be tested to the limit, so my advice is to have at least a mental game plan for the day. Here are a few of the most important things to think about and plan for:
Make sure to dress properly: do what you can to keep your fingers and toes warm, take good care of your feet (sock selection, lubricant), stay hydrated.
Even more importantly, plan for an extra-long day which may run from around midnight to well into the next afternoon. Keep something in reserve.
There are no brownie points for carrying your own pack on this day so ask an assistant guide or porter to help you with it. It may make the difference between summiting or not.
Be ready to shift down into a mental low gear – call it mountain 4-wheel drive – for the several hours on the last, steep ascent up to Stella Point. By then it will be an effort to lift up your leg for each ledge and rock. Knowing this in advance will not make it easier but the fewer surprises the better.
Remember to conserve a little energy and enthusiasm for the way down. You’ve got maybe 5 hours to go after reaching the summit…
The days before the trek starts
If you can fit it in, spend a few days in Kenya or Tanzania on safari before you tackle Kilimanjaro. It will help you to deal with the jet lag of course, and if you live at sea level, you’ll be acclimating to an altitude of 3,500 to 6,000 feet or so, if you include the Serengeti and Ngorongoro Crater.
Prior to our Feb. 2017 Kilimanjaro climb, we did just that, spending several days in the Southern and Central Serengeti prior to flying back to Kilimanjaro. The day before the trek we met with head guide Daniel Kilango (200+ Kili summits under his belt!) and Leila of Summits for a detailed briefing, which entailed going over the day to day program and route and covering the ‘golden rules’ of the mountain (go slow is #1). Daniel did an individual gear check and I was happy to receive a ‘well-prepared’ rating. Among the items which he specifically asked about were Nalgene bottles because a Camelbak may freeze up on the last day.
Machame Route Days 1 & 2: Machame Gate to Shira Camp
Day 1: Machame Gate to Machame Camp
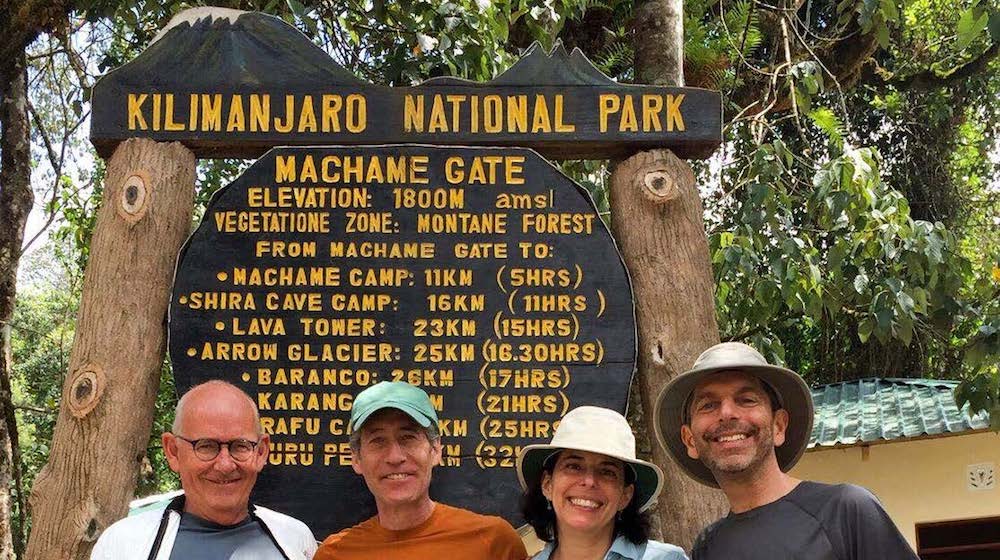
We were up early at 0600A for final preparations and we all enjoyed a good solid breakfast at Machweo Wellness. Excitement levels were through the roof! Except for one member of our party who had to abandon the attempt even before it started, due to incipient lung issues. Sorry Clemson! At 0830A we departed for Machame Gate via Moshi, driving through a rural area with scattered homes along the way. The distance was about 50 kilometers total and it took an hour and a half or so.
It took a good 90 minutes to complete the formalities at Machame Gate. We had to sign in, get our stuff weighed and obtain permits. Most of this handled by the competent Summits team. While waiting for some of this to happen, we enjoyed hot tea and coffee and biscuits in a pleasant picnic area.
Finally, around 11:40A we walked through the gate into Kilimanjaro National Park. Our great trek were to start in earnest. Right away we saw a troupe of Blue Monkeys in the trees. We did not see much in the way of wildlife – even birds – after that. Not that it mattered. We were soaking in the beautiful and serene rain forest environment with giant trees towering above us.
Perhaps 2 hours into the hike, we heard some thunder in the distance, but it wasn’t until 30 minutes later that it started to rain. At first lightly and then hard. A veritable tropical deluge, dumping buckets of water on us with near constant lightning which thankfully remained well above us.
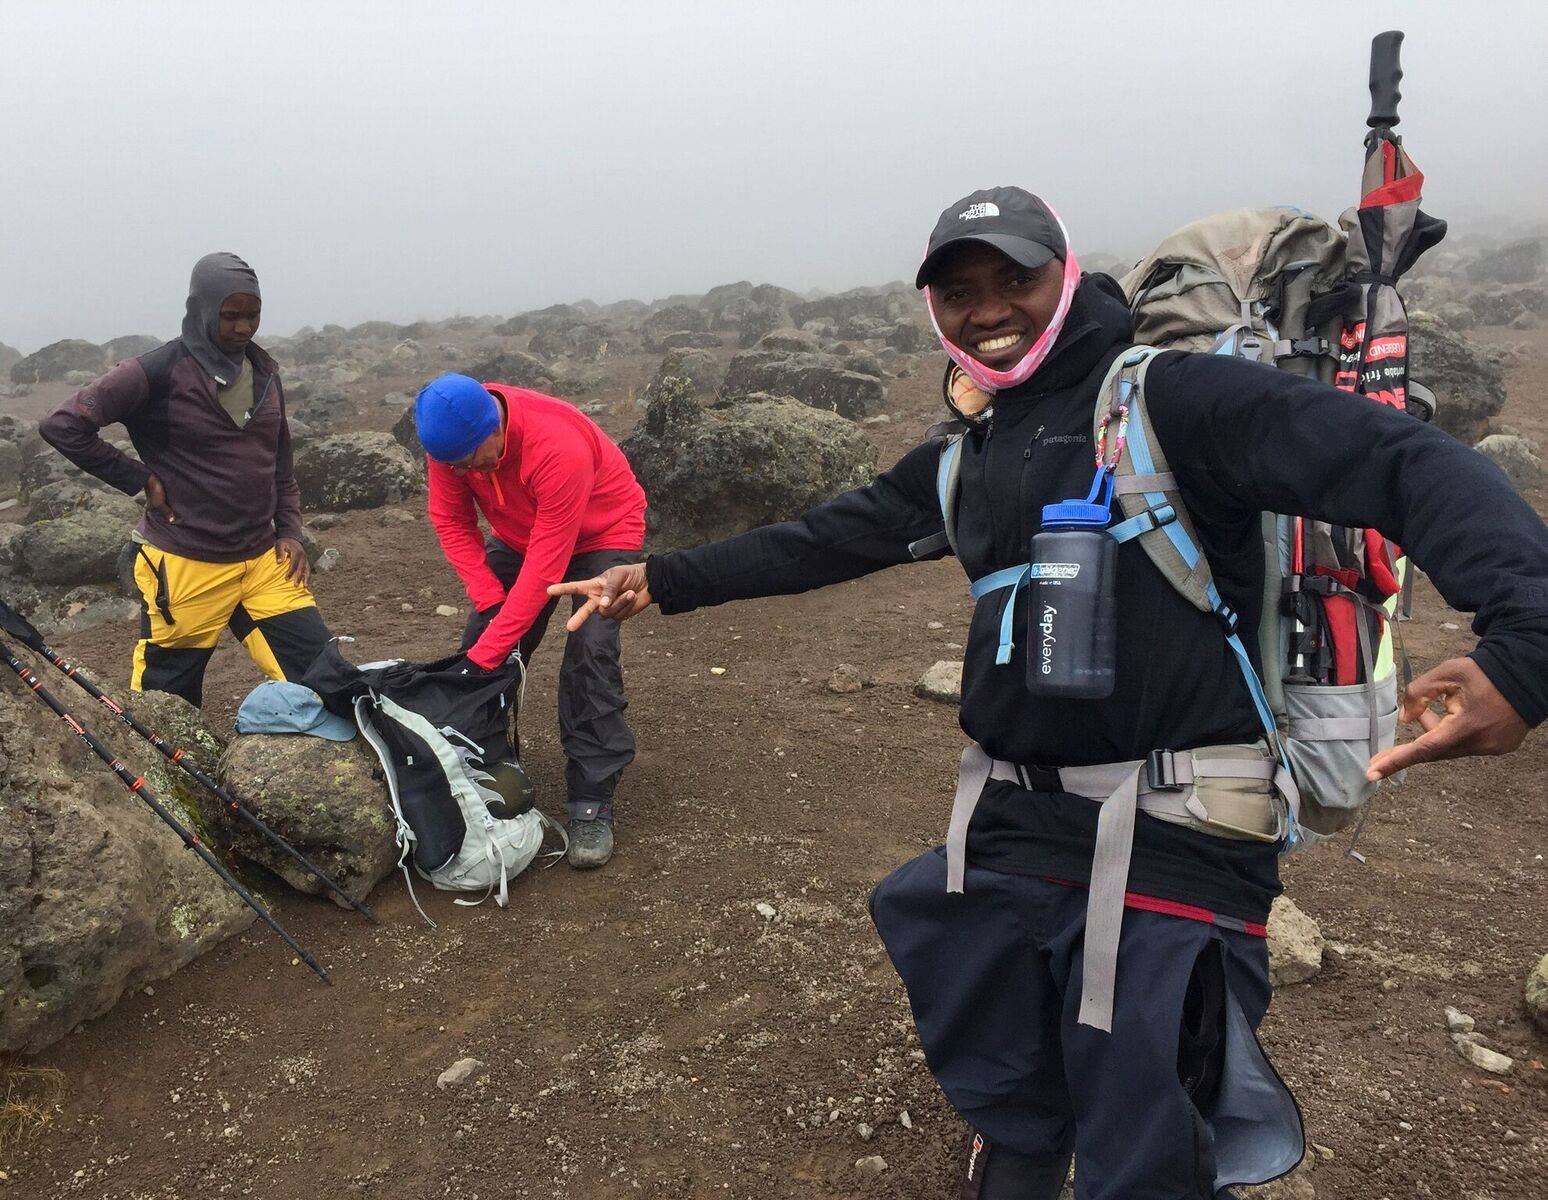
By now we had donned our raingear which included Gortex jackets, ponchos, backpack covers, gaiters and rain pants. As it turned out our gear was only partially waterproof – most of us ended up with unwanted water somewhere: boots, backpacks, clothing. My Asolo boots held up well in the severe rainstorm and in fact throughout the climb, earning a 100% waterproof check. Incidentally, a cheap ultra-thin 50 cent plastic poncho ended up being the star of the day in the gear category: it did a sterling job of keeping the rain out of my backpack.
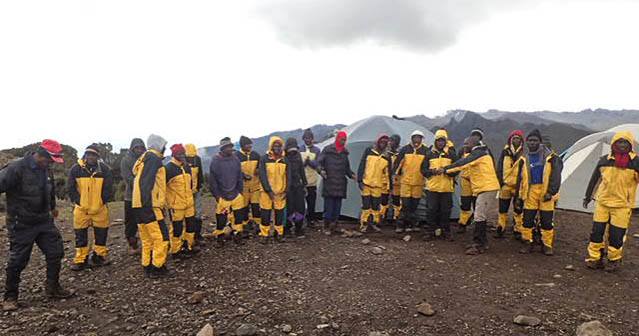
By the time we got to Machame Camp at about 6:00P it had stopped raining and the air was clean with pockets of blue sky. After a stirring welcome song from our group of 30 porters, cooks, butler and assistant guide, we were shown to our tents. Roomy enough for one person, the tent had a mattress and sleeping bag with pillow. We freshened up with a bowl of hot water, changed into warm clothing and made our way to the mess tent. While dinner was being prepared we had some hot tea and coffee and popcorn. Served a bit later, dinner was an elaborate and nicely prepared spread of parsley potatoes, spinach, a vegetable mélange and tilapia. On the side? A couple of local specialties – ugali and maharage, a local bean dish.
Just before dinner our head guide Daniel conducted the first of what would be daily individual assessments, asking each of us how much water we had consumed, if we had a headache, suffered from fatigue, dizziness, or diarrhea. Each of us also got a finger oximeter reading with most of us checking in with a reading in the low nineties Pretty good.
A quick briefing on what to expect for the next day and then it was off to bed with the temperature dropping fast. I slept surprisingly well – close to 7 hours.
Machame Route Day 2: Machhame Camp to Shira Camp
I did not need the 6:00A wake-up call on this day, having been up and getting ready since 5:40A. It is quite the rigmarole to get ready for a day’s trek on Kili. It is not only about what to wear on the day but also about what to have in your day-pack: camera, sunscreen, lip balm, energy bars, rain gear, an extra fleece, gloves. The list gets pretty long.
After a bit of a delay we got going around 08:00A and immediately out of Machame Camp we started a steep rocky ascent which continued almost unchanged in terms of level of difficulty for nearly 9 kilometers. It was everything one may have anticipated on a Kilimanjaro climb: tough, relentless, challenging and even dangerous in a few spots where a slip on a wet rock may have resulted in injury. No massive cliffs so not potentially deadly but scary nonetheless. One more reason to wear grippy boots and use poles.
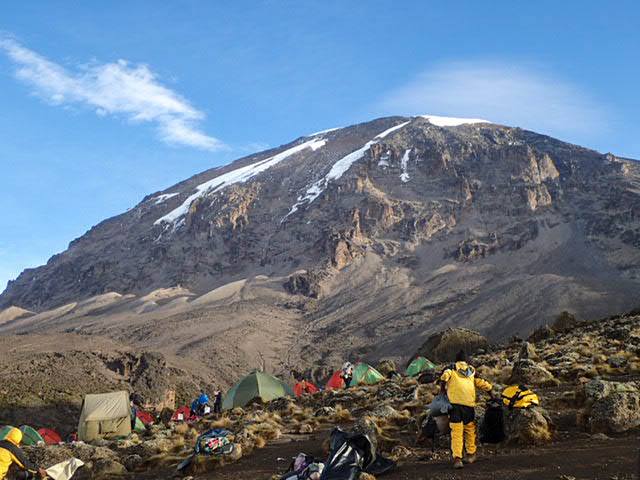
There were several spots where the poles were redundant and even a bit of a nuisance, such as when we had to use both hands to clamber up or down. Even so they were very much worth taking along. We experienced a little more rain but nothing serious, not even close to the previous day’s deluge. Just as well. By about 3:00P after a long, slow hike we arrived at Shira Camp, happy to be serenaded again by our crew of porters and other camp staff.
A late lunch (chicken & pasta main course) was followed by a couple of hours of down time. I found a spot with cell phone coverage (a line of other people on a ridge right outside of camp) so managed to get a few texts out. The views from Shira Camp were spectacular with the summit visible in the distance. On the other side of camp there were more stupendous views over the Moshi area and of Shira Cathedral. Dinner was again delicious and filling – white rice, a beef stroganoff stew, steamed vegetables, ugali and more. After our nightly physical assessment, and briefing for the day to come, it was early to bed to get sufficient rest.
Machame Route Days 3 & 4: Shira Camp to Karanga
Machame Route Day 3: Shira Camp to Barranco Camp
Another big day with a lengthy up and down hike out of Shira Camp. The first 5 hours of the climb traversed open, desolate terrain with little in the way of vegetation or animal life. For the most part the trail was not excessively steep but quite long, a total of 15 km for the day.
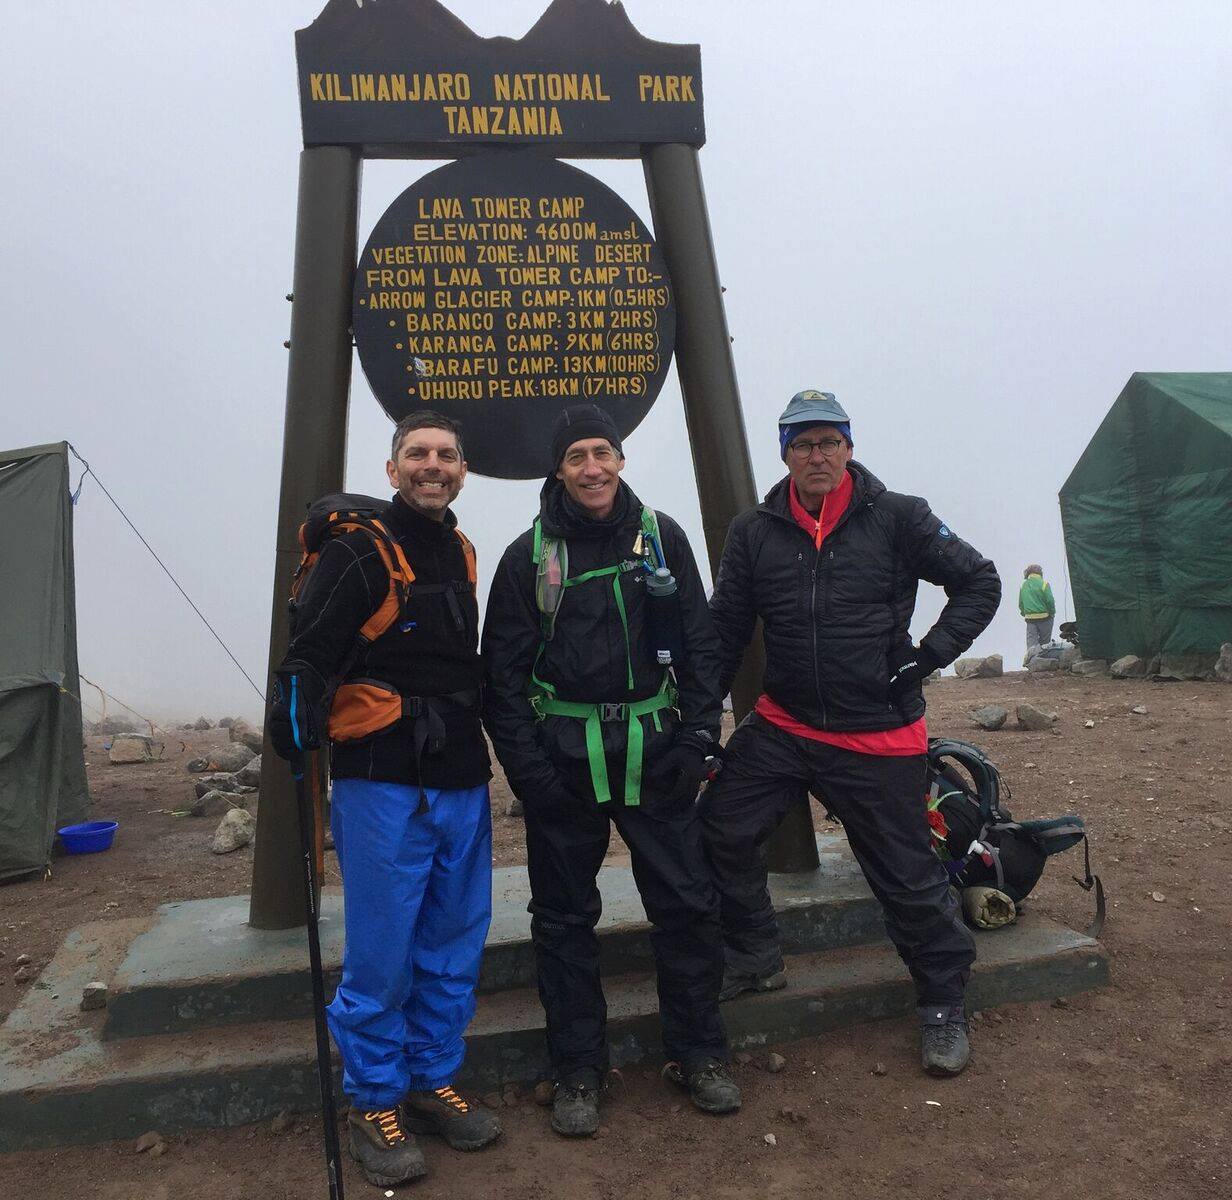
Our first objective was to reach lava Tower, an impressive rock formation, for lunch. Surprisingly and rather miraculously our mess tent had already been set up by the time we got there at 12:30P and lunch (soup and sandwiches) with chicken and potatoes, was served shortly afterwards.
After lunch, we made a quick descent (2 hours) to Barranco Camp where we would spend the night. Right opposite the camp and clearly visible on arrival, is the daunting Barranco Wall, a steep cliff which we would traverse the next morning. We could see the deserted switchback trail which we knew would be thronged with climbers, porters and guides the next morning.
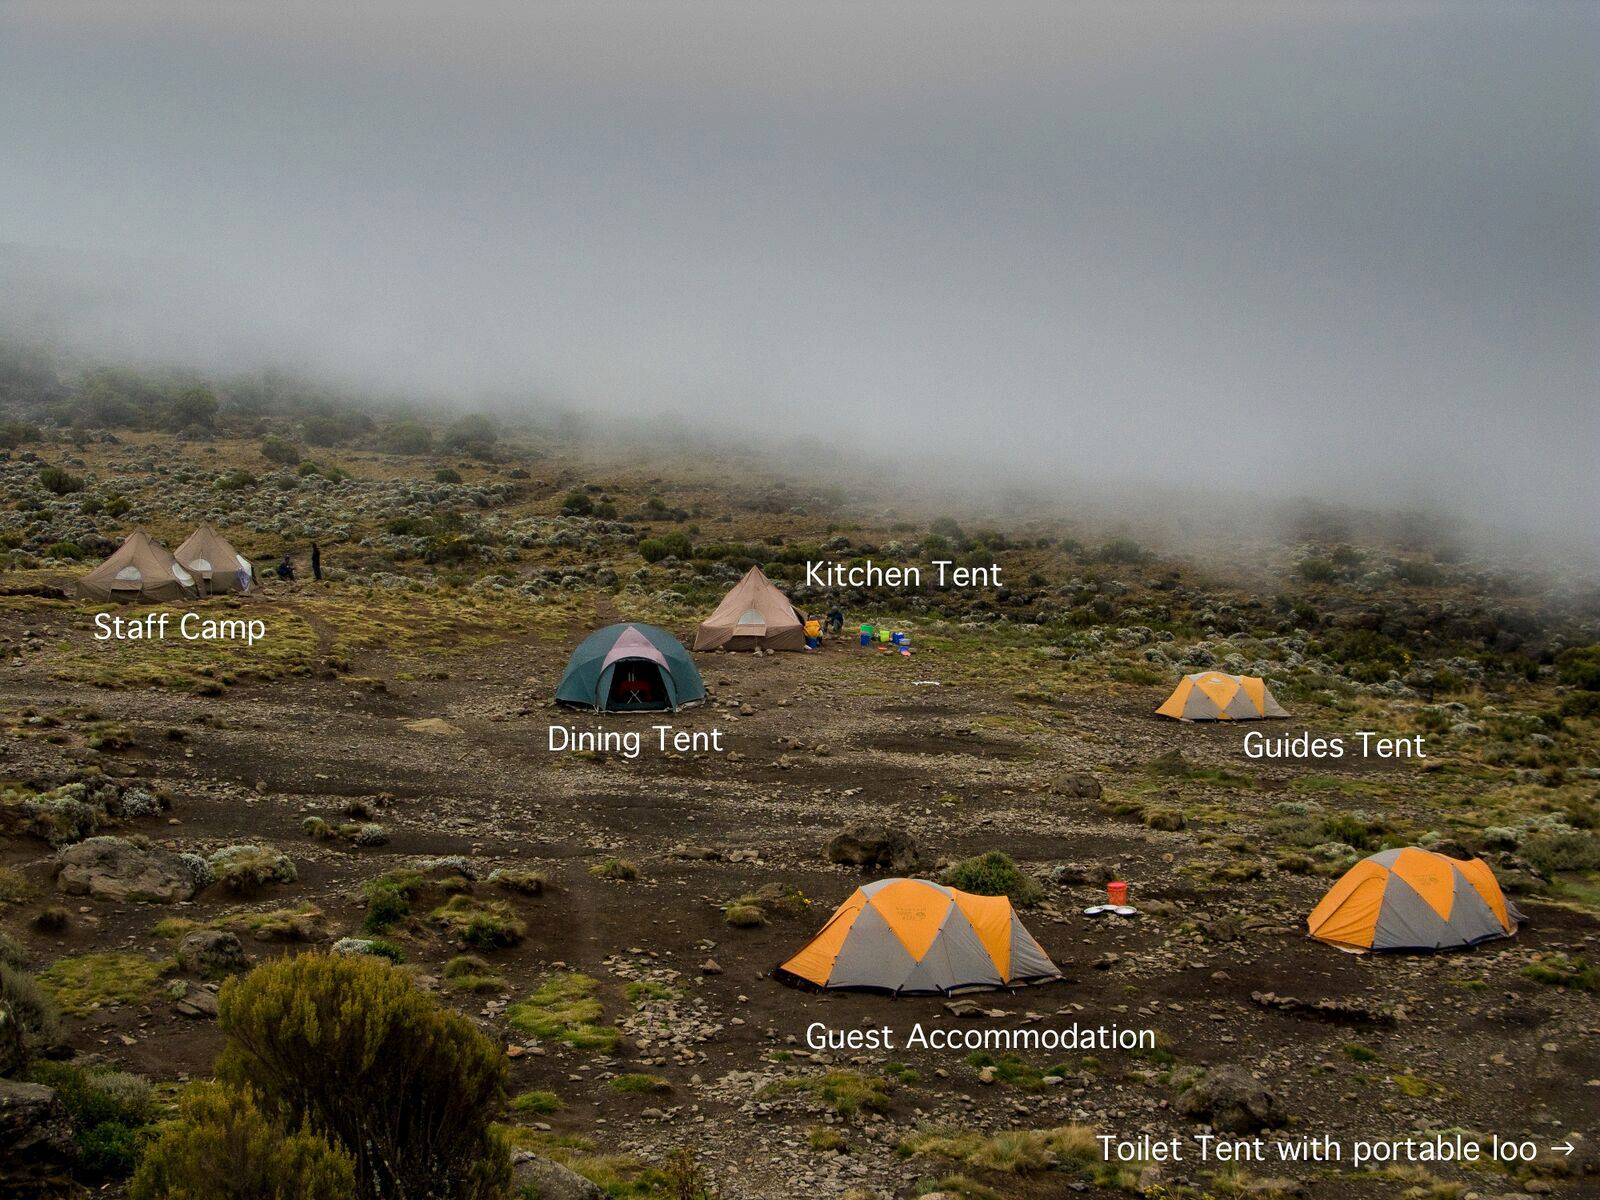
Barranco Camp is a pretty spot, with the wall on one side and a valley on the other. As usual, our tents were clustered together in one spot, not far from each other, with a convenient toilet tent ( ‘the helicopter’) nearby, and a mess tent some distance further. Other components of the camp were a kitchen tent as well as tents for the porters, chefs, camp assistants and guides.
Barranco is the prettiest of the campsites we have seen this far. Almost surrounded by mountains, it feels like a large rock island suspended among the hills.
Dinner was again served at 6:30P to enable us to get a good night’s rest. This time around, it was garlic bread, zucchini soup, spaghetti with ground beef.
Cell phone coverage (Airtel) is good at Barrranco, particularly along a rocky ridge which bisects the camp. Several people could be seen out and about, either in conversation or staring intently at a small screen. Different setting, same behavior.
Machame Route Day 4: Barranco Camp to Karanga
On this day we tackled the Barranco Wall. For some reason I had the completely wrong idea about the size of this natural barrier which constitutes one of the Machame Route’s biggest challenges.
It is not called a wall for no reason. Essentially a cliff face more than 800 feet high, the trail up the Barranco Wall is a test of strength and agility and is not for the faint at heart. The mix of tight switchbacks, ledges, solid rock slabs and narrow gaps is formidable indeed. Two areas are a test for practically anybody except the youngest and most agile among us. The ‘kissing rock’ is one of them. At a certain point I found myself with all my weight on the tip of my left boot, having to swing my right leg around a gap of a good 5 feet or so. It doesn’t sound like much on paper, but in the actual situation one slip could have a disastrous outcome.
After about 2 hours we reached the summit of the ridge where we – and a bunch of other people – relaxed for a while to enjoy the achievement and marvel at the views.
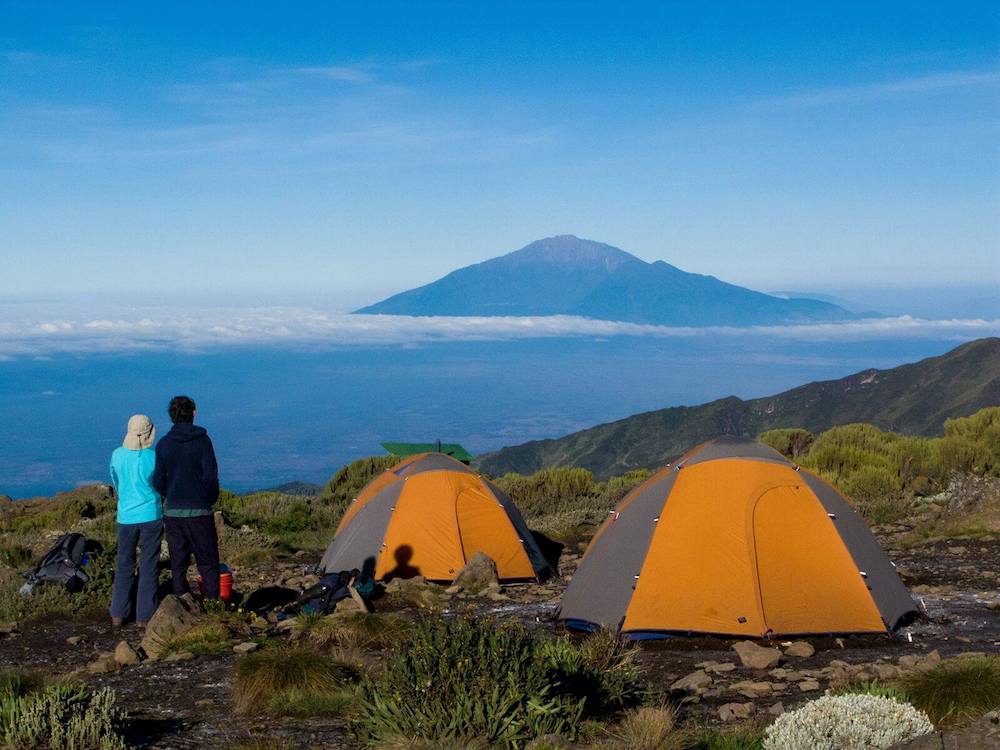
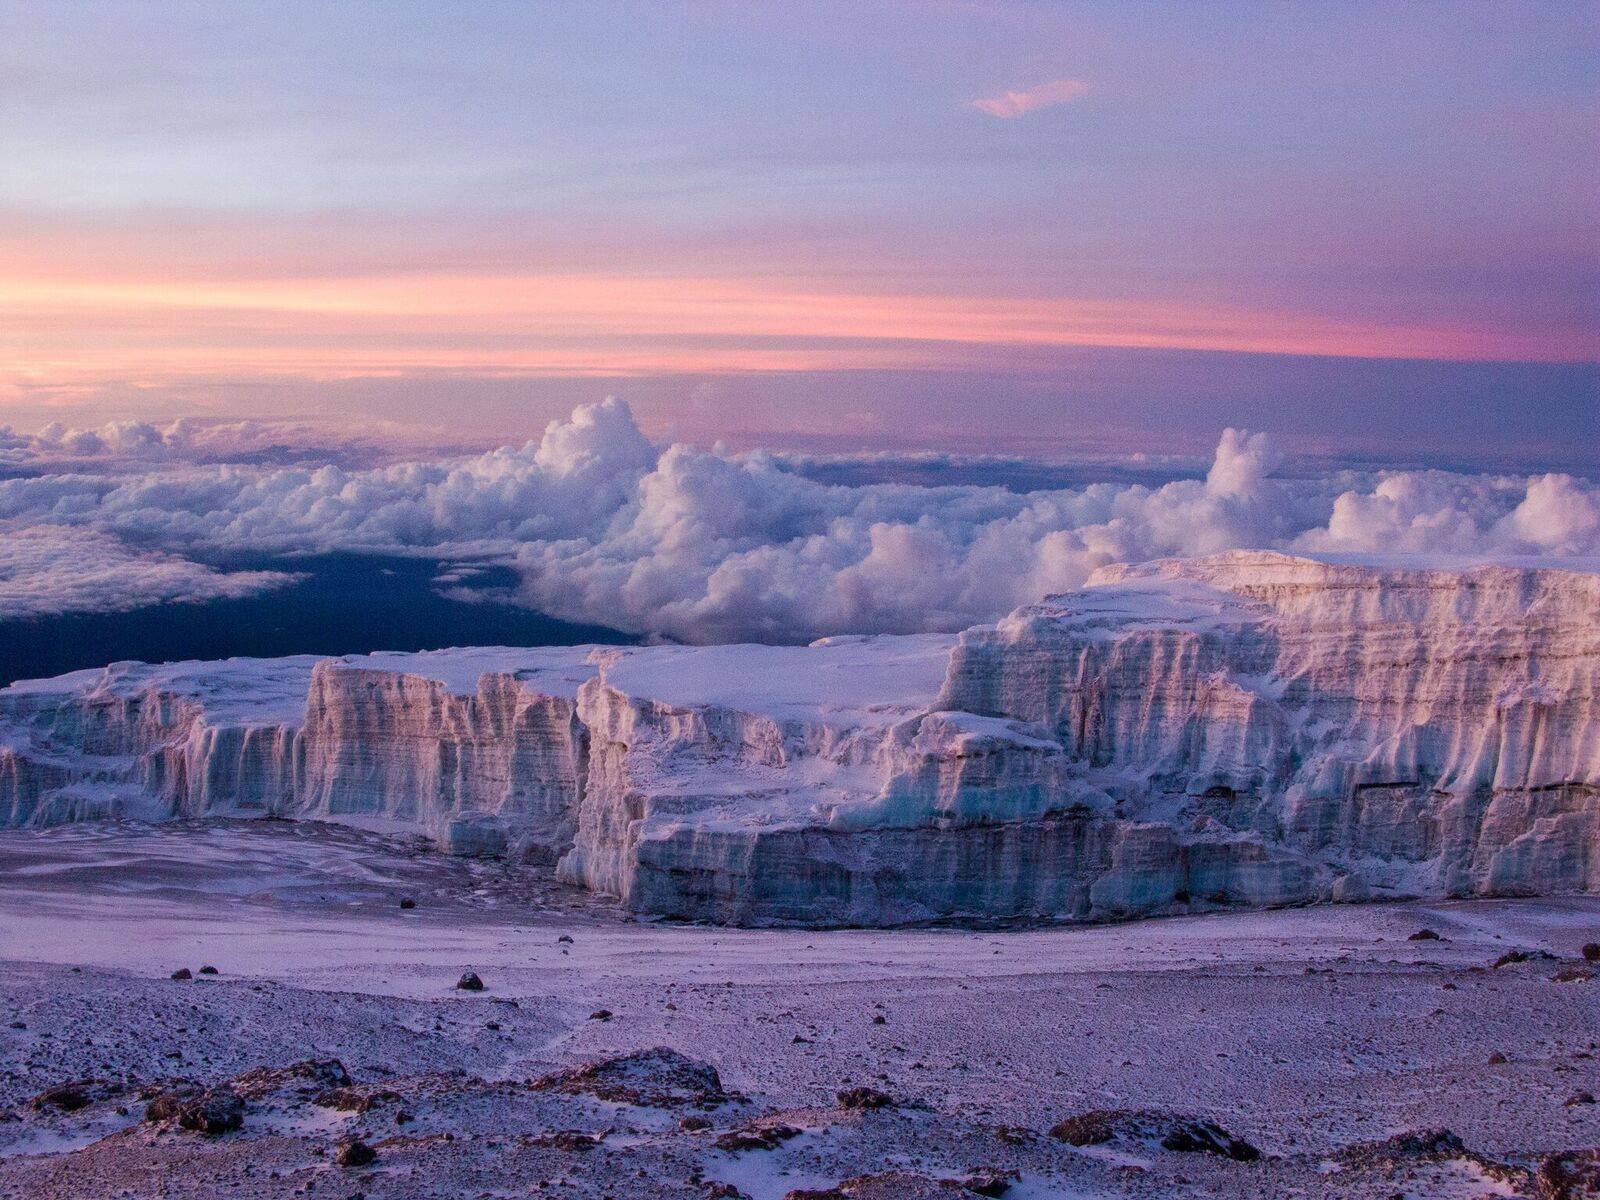
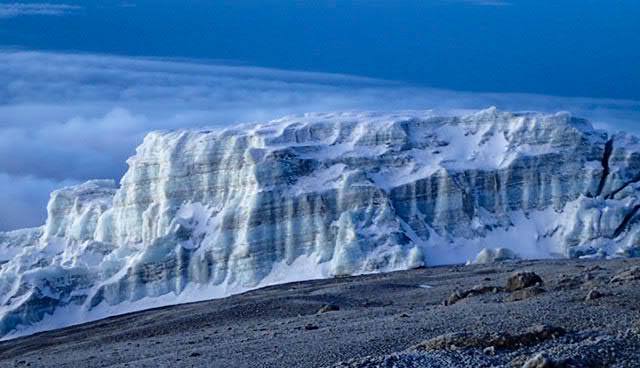
I hadn’t mentioned it up to now but believe me the views on the Barranco Wall and specifically from its summit, are among the most spectacular of the climb. To the east the peak of Mt. Meru (15,000) could be seen emerging from a cloudy basin. While to the north-west, the Kilimanjaro massif could be viewed clearly, its side streaked with two large snow glaciers.
We posed for some pics, got some more water and enjoyed a light snack and then continued. The descent on the other side was a test too: steep and gravelly in parts, one had to be extremely careful not to slip and take a dive.
The trail ended at a stream where many porters could be seen refilling water containers.
After another brief respite we carried on by negotiating a very steep, yet thankfully relatively low hillside, leading directly to Karanga Camp. The altitude of this camp (13,066 feet) is about the same as Shira Camp which we had left 2 days ago. The overnight at Karanga added a 7th day to our trip, the better option compared with the 5-night trip which skips Karanga, continues on to Barafu (another 4 hours) and culminates with a summit attempt that very night.
Spending the night at Karanga enables one’s body to better adjust to the high altitude and improves the chance for success on the final ascent, quite significantly.
The next day we were going to push slightly beyond Barafu to Kosovo Camp. By the time we reached Kosovo we’d have completed a short but punishing section of the final ascent route. So the following day would be the big day: Early out of Karanga and on to Kosovo where we would try to get a few hours’ sleep until a midnight departure for the roof of Africa, the summit of Mt. Kilimanjaro at 19,300 feet.
Machame Route Days 5 & 6: Machame Gate to Shira Camp
Machame Route Day 5: Karange to Barafu/Kosovo
After another decent nights’ sleep (I was awake a couple of times), I was up by 5:45A for all the preparations for the day’s hike. New on the menu? Trying out a pair of sock liners. My feet felt good for the duration of the walk so I decided t wear them again for the summit attempt starting at 30 minutes past midnight on this day.
Our hike this day took us through and up a fairly steep path through a high plain littered with small and large rough-textured black rocks.
To our left Kibo peak could be seen clearly, a large white glacier reflecting the sun. At one stage we watched a commuter-type aircraft circle the mountain for what must have been some splendid views before it headed off in the direction of Arusha.
At the crest of this rise the trail dipped down into a glacial valley, only to rise again quite sharply (some rock-hopping involved) before we got to Barafu. Barafu is a large camp, being the main springboard for Kibo for the Machame, Umbwe and Lemosho routes. We checked with the local warden and rested for about 20 minutes or so (I enjoyed a Mars bar, a small banana and 250ml of juice) before setting off again for Kosovo. As I had mentioned previously this put us about an hour closer to the summit. We were all happy with this decision because the first hour out of Barafa was one of the most difficult stretches yet; a steep hill littered with large slabs of rock scattered in helter-skelter fashion. Several times we were simply climbing over and around rocks and negotiating patches of flat rock, rather than following any marked trail.
Completing this section of the trail at night would have been significantly more strenuous and tricky. We got to Kosovo at around 11:30A, enjoyed a great lunch of ‘kuku and chips (fried chicken and French fries) about an hour later. The mountain was clearly visible and very much dominated the landscape, looking right in front of us. To the east Mawenzi Peak could also be seen from time to time.
The idea is to get some sleep in preparation for the evening’s summit attempt. I gave it a shot and managed maybe a one hour nap, but that was it.
Machame Route Day 6: Kilimanjaro Summit
At 1030P on the night of our summit attempt we were up and getting ready. Boots? Check. Gaiters? Check. Walking sticks, bandanas, fleece, thermal underwear? Check. The list is a long one. The temperatures can drop to well below zero Fahrenheit (-16 Celsius) and rain is also a factor, so all bases need to be covered.
By 11:30P we sat down in the mess tent for a light breakfast (oats and toast) and right on the dot at 12:20A on Thursday 23 February we walked out of the camp in single file, following our head guide Daniel up the trail in the direction of Kili.
Almost immediately the elevation started to increase and just to make things interesting, we were climbing in complete darkness with not even the moon providing some ambient light.
As opposed to our daily hike to get to this point, the summit day was ‘all business’ and there was not a lot of light banter going on as usual. The prospect of hiking nearly 7 hours in the dark while negotiating difficult and sometimes potentially dangerous terrain tends to focus one’s attention on the job at hand. One step at a time. Pole Pole.
As the hours slipped by and we inched our way ever higher along the winding trail leading to the edge of the crater, I tried to comfort myself with the knowledge that in terms of actual distance, we did not have far to go. It didn’t help much.
To say that the climb was hard would be an understatement. Its duration and intensity combine to make it one of the hardest things most people will attempt in their entire lives. From 16,000 to 19,000 feet and above, the human body is simply not capable of utilizing blood oxygen as effectively as at lower altitudes. Most people attempting this 7-hour uphill climb are not yet acclimated to such high altitudes, having spent just a few days at 10,000 feet plus.
This manifests itself in shortness of breath, fatigue & dizziness, all of which negatively impact one’s performance at altitude. Every high step onto a rock or ledge became an effort and I wondered how much more of this I was going to be able to handle. By this time I was totally gassed and it took every ounce of perseverance and determination to keep going. The same could be said of my fellow climbers.
Just about then, I heard voices. The relief flooded over me – obviously we must be close to Stella Point! And so it was; not 10 minutes later we were sitting down at Stella Point for a really well-earned cup of hot tea. Uhuru Peak was about an hour away, along a fairly gentle slope compared with what we had just been through.
By now the morning light was starting to illuminate the striking natural beauty of the area. Brilliant white glaciers against a dark blue morning sky, a dense band of clouds obscuring the surrounding forest areas, and of course the massive crater itself with the ash pits visible from afar.
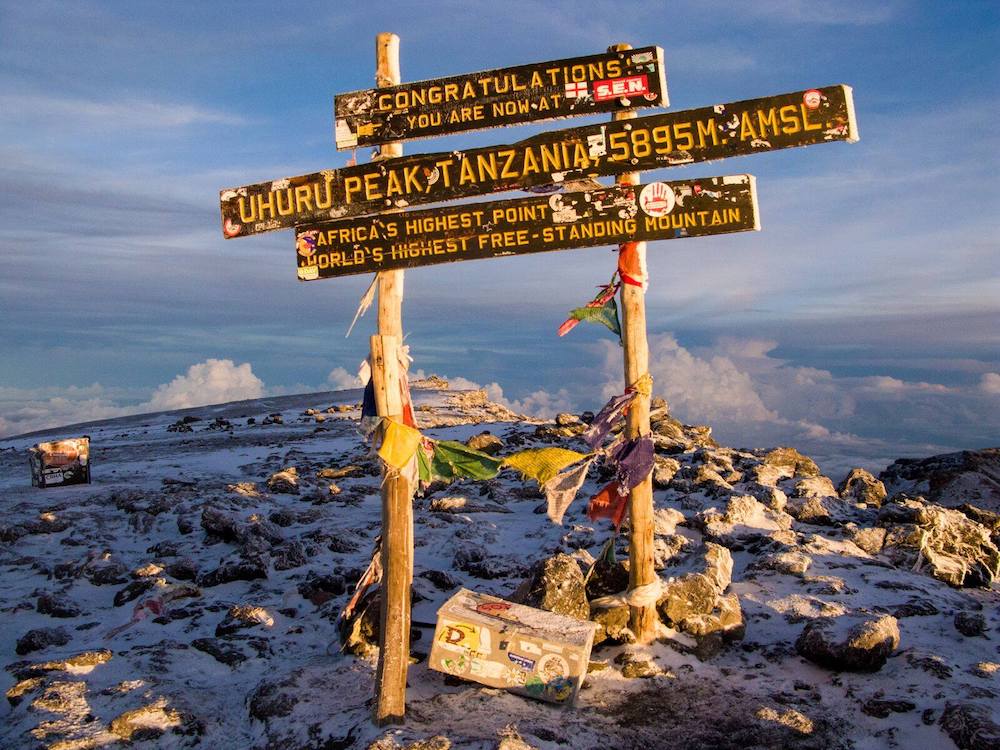
Although Uhuru Peak itself is a somewhat nondescript jumble of rocks not a lot higher than its surroundings, reaching it is a milestone of epic proportions for ‘every day’ climbers. And for many people it is a huge big check on their bucket list. The official TANAPA synopsis describes it as ‘the physical and photographic manifestation of one of the worlds’ signature adventures: conquering the highest mountain in Africa. From a personal perspective, the high point for me was seeing the familiar Uhuru sign slowly emerge from the gloom and reveal itself in the foggy mountain air. We did not linger long: took our turn (yes there was a short line) for the summit pic in front of the sign, big grins hiding the fatigue and sleep deprivation. We did it!
So how difficult was it – really?
If anyone ever says that climbing Kili is ‘easy’, they are not doing it from the perspective of most of the thousands of persons who attempt to do it every year. For them, like us, it was a monumental endeavor which required good planning, proper equipment, lots of support, and a good amount of training and preparedness.
Climbing Kilimanjaro is challenging and can be dangerous (altitude sickness is a potentially deadly condition) yet it continues to attract thousands of people every year. Why? Kili is accessible and for all the popular tourist routes, no technical mountain climbing gear or skills are required.
Kilimanjaro pushed me to the limit of my physical resources and demonstrated that if one wants to hike one of the routes and enjoy the experience, a high level of physical fitness and endurance – while not mandatory – make it challenging but doable, rather than a grueling trek punctuated by some punishing climbs.
For the most part our daily hikes on the Machame Trail were long and arduous, but none of them was a supreme test of fitness. The 7-hr hike to the Crater on the last day, is where one’s physical prowess or the lack of it becomes evident. If you’re relatively fit and did some pre-climb training, it will be hard but manageable and – well – fun. Show up in bad shape and you will pay dearly in the form of having to bail out. Of course illness and external factors such as altitude sickness, lack of sleep, come into the equation as well. The arduous summit day climb is pretty much the same for the Machame, Umbwe, Lemosho, Rongai and Marangu routes.
As if the day wasn’t long enough already, we had to hike down from the Crater rim to our campsite (Kosovo) and from there to Mweka Camp. All in all this took another 5 hours of hiking, starting with a couple of hours or so of ‘scree-skiing’ down steep paths. By now our legs were pretty much shot. Not far out of Kosovo, the trail started to get a lot steeper. It turned out to be a real slog with the trail dipping down from the highland plateau to the forest via some abrupt steps, with boulders instead of bricks, and lots of protruding natural rock formations. Also, it was wet on the day which made this physically taxing trail even more of a challenge than one would expected.
Finally we made it to Mweka campsite which was quite large with two huge campsites filled with hundreds of hikers year-round. It felt good to realize that the we had nailed it, Kili was ours. We slept well that night.

Machame Route Day 7: From Mweka back to Moshi – The End
It’s never over until it’s over and so it was with Kilimanjaro. Before we could enjoy our first shower in a week, we had to walk down from Mweka Camp all the way to the Mweka Gate, about 10k or 6 miles. All downhill. Wet and slippery to boot, with hundreds of steps and rocky drops testing one’s agility and balance constantly.
Of course we were happy and rested by now, having enjoyed a good and long night’s rest at around 10,000 feet the previous night. Even so, piled on top of the previous day’s extraordinary test of endurance, it was something. My quads took a beating which I was reminded of over the following two or three days because of delayed onset muscle soreness.
Earlier that morning, just before leaving camp, the camp crew and guides had given us a rousing farewell with a few songs extolling our virtues (or so we hope) and ending with the traditional Kilimanjaro Jambo song.
We opted to have the tipping included in the price to be distributed by the tour operator office. It is also possible to use this farewell event to hand the tips directly to the persons involved, which in retrospect may have been a better choice. We will revisit this issue for any future attempts.
We reached Mweka Gate at around 1100A, checked out, received our completion certificates and then were treated to a sparkling wine celebration in the parking lot.
Back in the vehicle we set off for Moshi Town for a quick shopping interlude. Most of the other customers were tourists too and the prices were marked in US$. Nonetheless they had a good variety of items from $10 shirts to Tanzanite stones costing several thousand dollars. And everything in between: wooden carvings, drums, ceremonial sticks, place mats, bracelets, wall hangings and more.
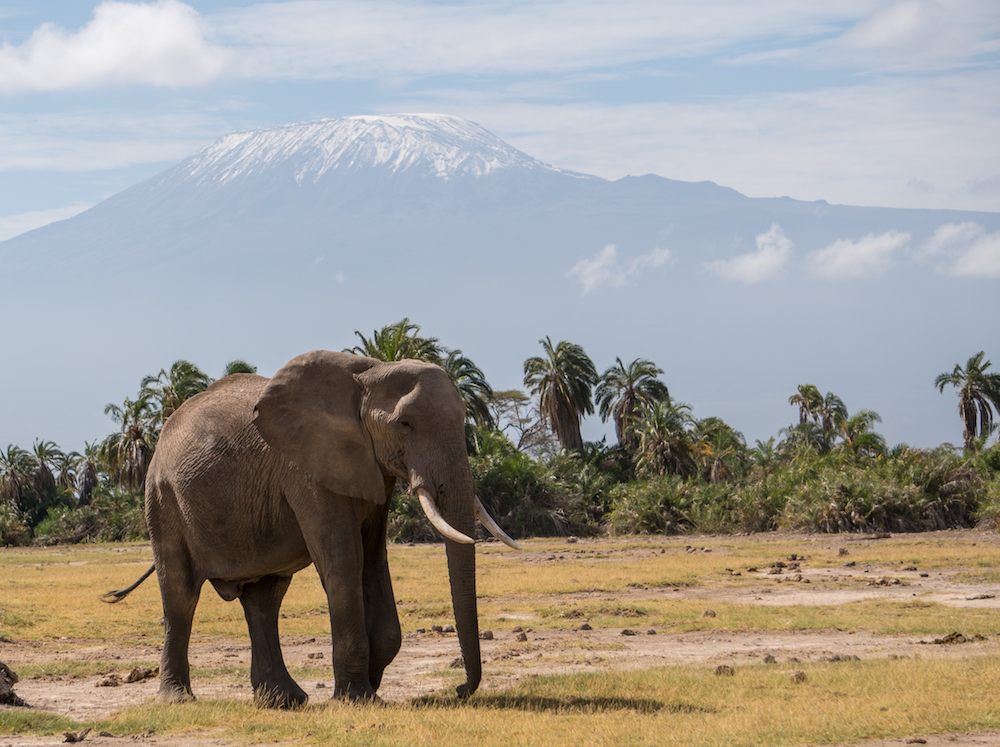
After a lunch of kuku and chips at a small kiosk, we drove the 45 minutes or so to Arusha and that was that. A short debriefing from Leila of Summits, last farewells and our Kilimanjaro adventure had come to an end. The following day we’d be heading off to Amboseli in Kenya for somewhat more distant looks at Kili, hopefully with a Tusker in hand!
Would I do it again? Yes – a return to Kilimanjaro to summit via the Rongai Route is in the planning stages. The trip will include a few days in Kenya prior to the climb.
Would I recommend a Kili attempt for others? Yes again. If you think you can do it, you probably can. Do some hiking, build up your leg strength and of course – pole pole.
What would I do differently? I would certainly try to get a bit more lean before getting on a plane for Kilimanjaro – and I would take more photographs. I think I was too pre-occupied with simply climbing and making it, the first time around, to properly document this amazing adventure.